Why do we need to extract data from ERP Cloud?
- Many times, there might be cases where we need to extract and share data to external systems. Unlike on-premise, we cannot query the source database of cloud directly through some adapter and get the data.
So how do we get it?
- Oracle Transaction Business Intelligence (OTBI) is the answer for it. Oracle ERP Cloud comes with Oracle Business Intelligence. Reports can be created through Oracle BI and ran to extract data.
Again, even through reports, there are different ways to extract data.
1) Create a BIP (Business Intelligence Publisher) report and run the report through webservice directly to extract the data
2) Create a Custom ESS job over the BIP report and extract data by calling webservice
We will go through the implementation steps and differences now.
Note: This blog does not cover the basics of ERP Cloud or Oracle SOA implementation.
Create a BIP report:
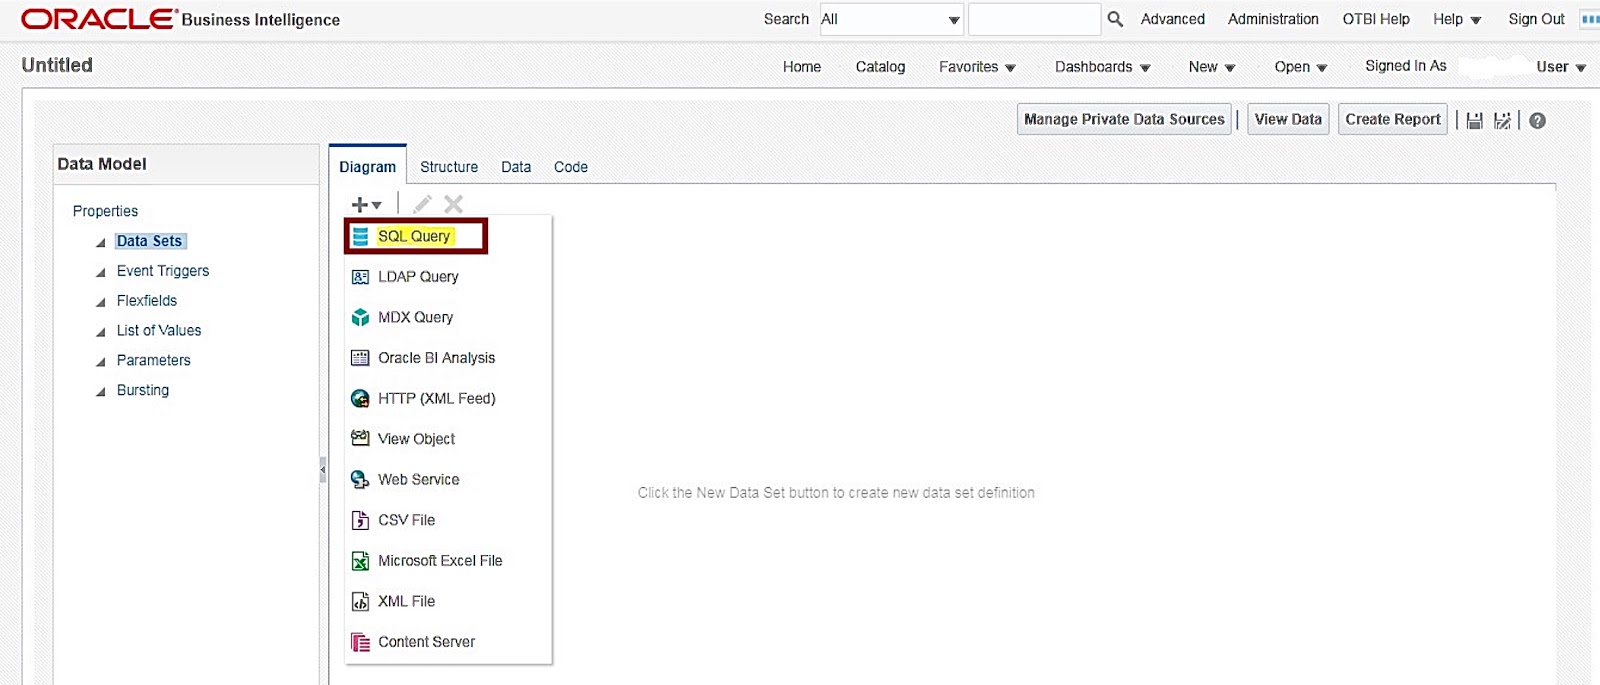
a. Login to BIP console. Click on home page -> More -> Reports and Analytics -> Select "Create Report" from dropdown -> Select New Data Model (PO_INVOICE_LINES). Under Diagram, select SQL Query.


b. Enter the sql query that you need to fetch relevant details.

d. Now edit the report. Select View a list at the upper right corner. In the "Output Formats" select both Data(CSV) and Data(XML).
Creating a report is common for both 1 and 2 methods.
1. Run BIP report
There are separate webservices to interact with Oracle BI Publisher. These services help to performs actions like schedule services, run reports, etc.
The service that specifically provides methods to interact with BI Publisher Report object is the ReportService.
It is hosted at the following wsdl url -
You can check oracle docs for the complete list of methods that ReportService provides.
In this case, we would need to call runReport() method, which sends request to the BI Publisher server to run a specific report.
a. Drop a SOAP adapter in your SOA composite. Give the wsdl url as below.
http://{cloud-instance}/xmlpserver/services/v2/ReportService?wsdl
b. Choose the operation as runReport.
c. Map the following input through transformation in SOA.
reportAbsolutePath - Is the path at which we saved the newly created BIP report in Step c of "Create BIP Report" section above.
parameterNameValues - I have a query parameter in my sql which in Invoice Id. We should pass the same field name and value as defined in the report. If there are no parameters in your report, please ignore this section.
Sample request for runReport operation:
d. Trigger the service from SOA. You would see that the report is ran successfully and response contains the data from the report returned in the form of base64.
Sample response from runReport operation:
e. The base64 value in reportBytes is the actual response extract from the report execution. Convert it through any base64 conversion utility (say java code) and you can the response xml as follows -
2. Create Custom ESS Job
a. To create a Custom ESS job, login to ERP console. Go to Setup and Maintenance -> Name (Enter: Manage Custom Enterprise Scheduler Jobs for Financial and Supply Chain Management and Related Applications)
b. Go to Task Column and click on Create to navigate to create ESS job page.
c. Enter the following details -
Display Name, Name, Path, Job application name.
JobType - This field defines that the ESS job is going to run a report at the backend. Enter BIPJobType for this field.
ReportId - In this field, enter the report name and path which was created in the above section Step c of "Create BIP Report"

Under Parameters section, enter the one parameter InvoiceId that we need to pass to the report.
Now your ESS job is ready to be executed.
Call service from SOA composite:
All services/operations related to ESS jobs are hosted at the following service url in ERP cloud
http://{cloud-instance}/fscmService/ErpIntegrationService?wsdl
d. Drop an Oracle ERP adapter in your SOA composite. In the wsdl url section, provide the Service Catalog url - https://{cloud-instance}/fscmService/ServiceCatalogService?WSDL
Under the Service section, choose ErpIntegrationService and operation as exportBulkData and complete the wizard.
exportBulkData operation - This operation helps to submit an ESS job to export the data from the report and upload the job output file to Universal Content Management (UCM) server with callback and notification.
e. Transform the input as follows and trigger the service from your composite -
Request:
jobName - This will contain the Path and JobName with comma separation.
parameterList - If any parameters are defined, we provide the value of it in this list.
Response: A job would be created in Cloud and job Id will be returned through this service.
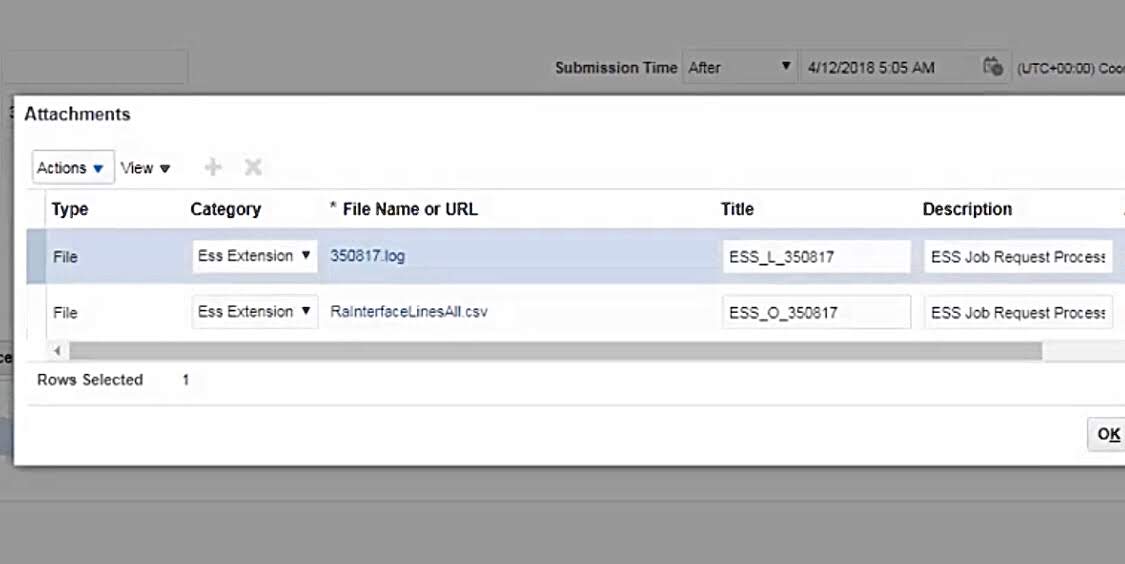
This service will export the response from the response in the form of CSV and load it into UCM. Based on the JobId returned here, we will have to invoke few more services to get the actual data from UCM.
I will publish the detailed steps of the consequent services needed in next blog posts.
runReport vs exportBulkData
These are two common ways to extracting the data from ERP Cloud.
- Many times, there might be cases where we need to extract and share data to external systems. Unlike on-premise, we cannot query the source database of cloud directly through some adapter and get the data.
So how do we get it?
- Oracle Transaction Business Intelligence (OTBI) is the answer for it. Oracle ERP Cloud comes with Oracle Business Intelligence. Reports can be created through Oracle BI and ran to extract data.
Again, even through reports, there are different ways to extract data.
1) Create a BIP (Business Intelligence Publisher) report and run the report through webservice directly to extract the data
2) Create a Custom ESS job over the BIP report and extract data by calling webservice
We will go through the implementation steps and differences now.
Note: This blog does not cover the basics of ERP Cloud or Oracle SOA implementation.
Create a BIP report:
a. Login to BIP console. Click on home page -> More -> Reports and Analytics -> Select "Create Report" from dropdown -> Select New Data Model (PO_INVOICE_LINES). Under Diagram, select SQL Query.

b. Enter the sql query that you need to fetch relevant details.
c. Create new Report (PO_INVOICE_Report) based on the Data Model created above. I am saving the report into Shared_Folders/Custom/BIP_Reports/

d. Now edit the report. Select View a list at the upper right corner. In the "Output Formats" select both Data(CSV) and Data(XML).
Creating a report is common for both 1 and 2 methods.
1. Run BIP report
There are separate webservices to interact with Oracle BI Publisher. These services help to performs actions like schedule services, run reports, etc.
The service that specifically provides methods to interact with BI Publisher Report object is the ReportService.
It is hosted at the following wsdl url -
http://{cloud-instance}/xmlpserver/services/v2/ReportService?wsdlYou can check oracle docs for the complete list of methods that ReportService provides.
In this case, we would need to call runReport() method, which sends request to the BI Publisher server to run a specific report.
a. Drop a SOAP adapter in your SOA composite. Give the wsdl url as below.
http://{cloud-instance}/xmlpserver/services/v2/ReportService?wsdl
b. Choose the operation as runReport.
c. Map the following input through transformation in SOA.
reportAbsolutePath - Is the path at which we saved the newly created BIP report in Step c of "Create BIP Report" section above.
parameterNameValues - I have a query parameter in my sql which in Invoice Id. We should pass the same field name and value as defined in the report. If there are no parameters in your report, please ignore this section.
Sample request for runReport operation:
<runReport xmlns="http://xmlns.oracle.com/oxp/service/v2">
 <reportRequest>
   <reportAbsolutePath>/Financials/Receivables/Shared_Folders/Custom/BIP_Reports/PO_INVOICE_Report.xdo</reportAbsolutePath>
   <parameterNameValues>
     <listOfParamNameValues>
       <item>
          <name>INV_ID</name>
          <values>
            <item>1244785</item>
          </values>
        </item>
     </listOfParamNameValues>
   </parameterNameValues>
 </reportRequest>
 <userId>test</userId>
 <password>xyz</password>
</runReport>
d. Trigger the service from SOA. You would see that the report is ran successfully and response contains the data from the report returned in the form of base64.
Sample response from runReport operation:
<runReportResponse xmlns="http://xmlns.oracle.com/oxp/service/v2">
  <runReportReturn>
     <reportBytes>PEludm9pY2U+CiAgPEludklkPjEyNDQ3ODU8L0ludklkPgogIDxBbXQ+NTAuMDA8L0FtdD4KICA8SW52RGF0ZT4yMDE4LTA4LTExPC9JbnZEYXRlPgo8L0ludm9pY2U+</reportBytes>
  </runReportReturn>
</runReportResponse>
e. The base64 value in reportBytes is the actual response extract from the report execution. Convert it through any base64 conversion utility (say java code) and you can the response xml as follows -
<Invoice>

  <InvId>1244785</InvId>

  <Amt>50.00</Amt>

  <InvDate>2018-08-11</InvDate>

</Invoice>
2. Create Custom ESS Job
a. To create a Custom ESS job, login to ERP console. Go to Setup and Maintenance -> Name (Enter: Manage Custom Enterprise Scheduler Jobs for Financial and Supply Chain Management and Related Applications)
b. Go to Task Column and click on Create to navigate to create ESS job page.
c. Enter the following details -
Display Name, Name, Path, Job application name.
JobType - This field defines that the ESS job is going to run a report at the backend. Enter BIPJobType for this field.
ReportId - In this field, enter the report name and path which was created in the above section Step c of "Create BIP Report"

Under Parameters section, enter the one parameter InvoiceId that we need to pass to the report.
Now your ESS job is ready to be executed.
Call service from SOA composite:
All services/operations related to ESS jobs are hosted at the following service url in ERP cloud
http://{cloud-instance}/fscmService/ErpIntegrationService?wsdl
d. Drop an Oracle ERP adapter in your SOA composite. In the wsdl url section, provide the Service Catalog url - https://{cloud-instance}/fscmService/ServiceCatalogService?WSDL
Under the Service section, choose ErpIntegrationService and operation as exportBulkData and complete the wizard.
exportBulkData operation - This operation helps to submit an ESS job to export the data from the report and upload the job output file to Universal Content Management (UCM) server with callback and notification.
e. Transform the input as follows and trigger the service from your composite -
Request:
jobName - This will contain the Path and JobName with comma separation.
parameterList - If any parameters are defined, we provide the value of it in this list.
Request:
<exportBulkData xmlns="http://xmlns.oracle.com/apps/financials/commonModules/shared/model/erpIntegrationService/types/">
  <jobName>oracle/apps/ess/financials/receivables/collections/shared,GetInvoiceDetails</jobName>
  <parameterList>1244785</parameterList>
  <jobOptions/>
  <callbackURL>#NULL</callbackURL>
  <notificationCode>00</notificationCode>
</exportBulkData>

Response:
<exportBulkDataResponse xmlns="http://xmlns.oracle.com/apps/financials/commonModules/shared/model/erpIntegrationService/types/">
  <result>170249</result>
</exportBulkDataResponse>
Response: A job would be created in Cloud and job Id will be returned through this service.
This service will export the response from the response in the form of CSV and load it into UCM. Based on the JobId returned here, we will have to invoke few more services to get the actual data from UCM.
I will publish the detailed steps of the consequent services needed in next blog posts.
runReport vs exportBulkData
| runReport | exportBulkData |
|---|---|
| Operation of ReportService from BI Publisher Services | Operation of ErpIntegrationService |
| Runs Report directly | Runs the ESS job encapsulating the Report |
| Returns the extracted data immediately to the calling service | Loads the extracted data into UCM |
| Not recommended to extract large set of data | Apt method to extract large set of data |
| http://{cloud-instance}/xmlpserver/services/v2/ReportService?wsdl | http://{cloud-instance}/fscmService/ErpIntegrationService?wsdl |
These are two common ways to extracting the data from ERP Cloud.


