It is a very common requirement in today's businesses to have services scheduled at particular time or run services at frequent intervals. In 11g, there are was no direct way to implement this scenario. We had take help of Java/Quartz scheduler or other tools to achieve this functionality.
But Oracle SOA 12c has made it amazingly easy through Oracle Enterprise Scheduler Service.
Through this blog, I will show you how to schedule a SOA service and automatically execute the service at scheduled time/time frame.
For this, we need to perform the following steps through em console:
1) Create a job definition for the SOA service
2) Create a schedule
3) Submit a Job request to run the SOA service
I created a simple Hello World kind of SOA project, which would take name as input and return "Hello - {name}" as response. My SOA project's name is PGSOAProject. Creation of this project is not in the scope of this blog.
Now to the scheduling part.
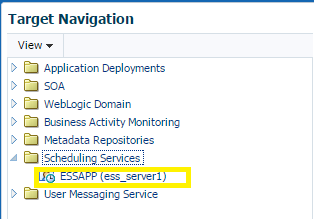
1) Login to em console. In Target Navigation section, under Scheduling Services, you would find the Enterprise Scheduler Service server. Click on the server.


But Oracle SOA 12c has made it amazingly easy through Oracle Enterprise Scheduler Service.
Through this blog, I will show you how to schedule a SOA service and automatically execute the service at scheduled time/time frame.
For this, we need to perform the following steps through em console:
1) Create a job definition for the SOA service
2) Create a schedule
3) Submit a Job request to run the SOA service
I created a simple Hello World kind of SOA project, which would take name as input and return "Hello - {name}" as response. My SOA project's name is PGSOAProject. Creation of this project is not in the scope of this blog.
Now to the scheduling part.
1) Login to em console. In Target Navigation section, under Scheduling Services, you would find the Enterprise Scheduler Service server. Click on the server.
Create job definition:
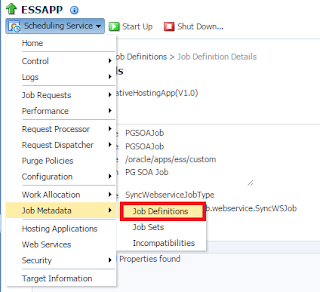
2) In the Right panel, click on Scheduling Service -> Job Metadata -> Job Definitions.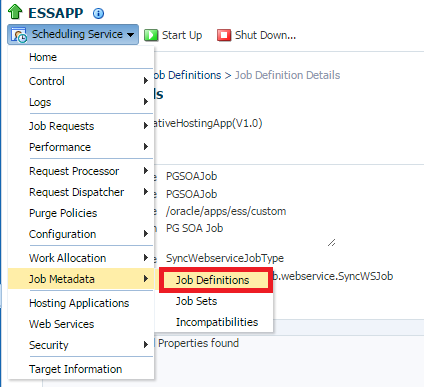
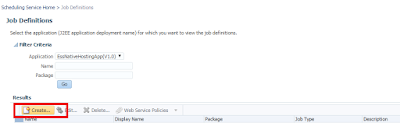
3) On the job definitions page, click on Create to create a new job definition.

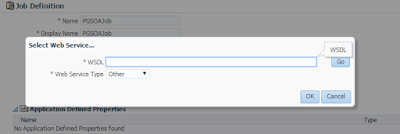
4) Enter a unique name for your job. I have given PGSOAJob. Package can be left as-is. Under Job Type, I have selected SyncWebserviceJobType as my SOA process is a synchronous process. Based on your type of service, you can select one option.

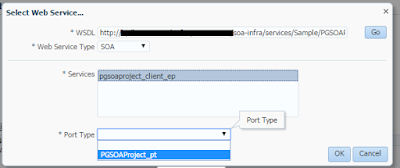
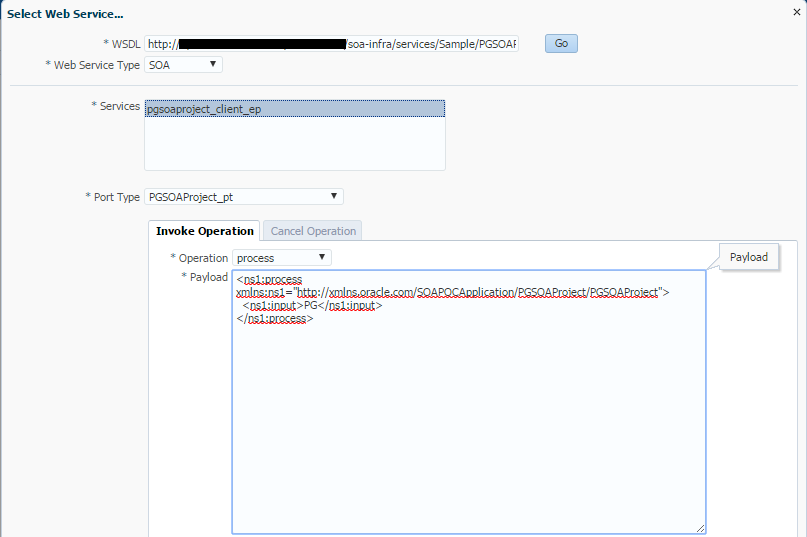
5) Click on the "Select Web Service" button in the above screenshot once the job type is selected. A popup would appear as below.

6) Enter the wsdl url of the SOA process. Choose the Web Service Type as SOA and click on Go beside the WSDL field.
My wsdl url is as follows - http://test.com:80/soa-infra/services/Sample/PGSOAProject/pgsoaproject_client_ep?WSDL

7) On clicking go, the wsdl would get loaded. Choose the Services and Port Type accordingly.

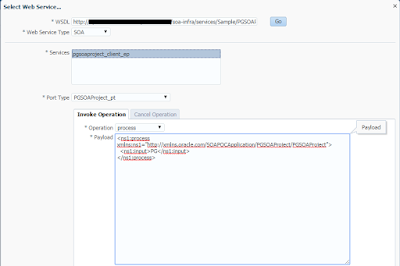
8) Next step is to choose the operation and add sample input. Click on Ok.
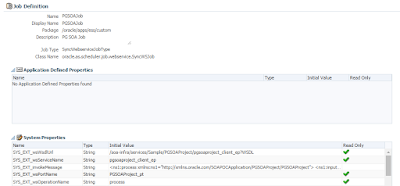
9) The final job definition looks as follows.

Create job schedule:
10) As the name suggests, Schedule defines the frequency at which a job should be run.
Go to Scheduling Services -> Job Requests -> Define Schedules.

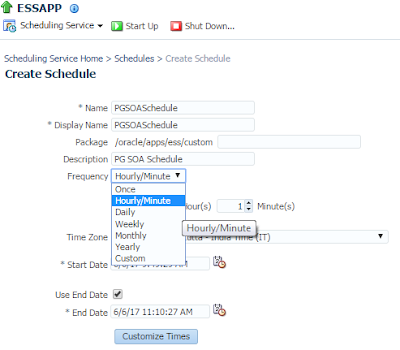
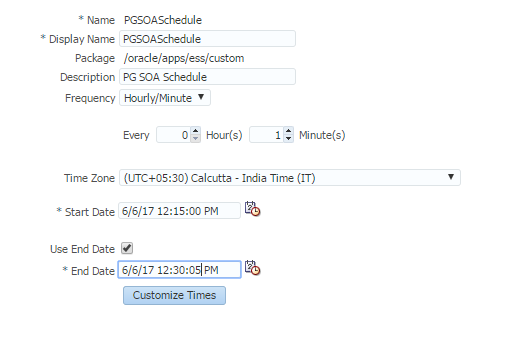
11) Provide Name and Display Name for the schedule. I gave PGSOASchedule as the Name. Next step is to choose the Frequency. I am going to create a schedule for every minute, hence, I choose Hourly/Minute.

12) Once the frequency is selected, Start Date and End Date fields are shown at the bottom. Choose the timezone, Start Date and End Date for the schedule. As per what I chose below, this schedule runs any job every minute, between 6/6/2017 12:15:00 PM to 6/62017 12:30:05 PM.
Submit job request with one time schedule:
13) In order to submit a job request, go to Scheduling Service -> Job Requests -> Submit Job Requests.
In the Submit Job Requests screen, click on search icon beside Job Definitions. In the popup, search for the Job Definition you created in point 1 (PGSOAJob). Once selected, click on ok.

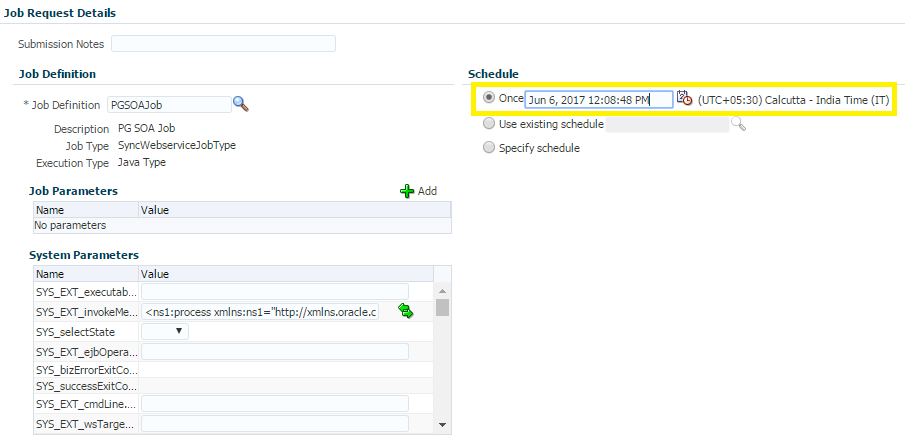
14) Following screen appears with job definition details loaded and a section towards right to choose the schedule. There are 3 options here
- Once - This option allows you to enter a time (One time) at which the job should get executed.
- Use existing schedule - You can select the schedule that is already created.
- Specify schedule - If there is no existing schedule created, but you want the job to run at a frequency in some time frame, you can choose this option and setup the time frame.
Here I will choose the one time option for now. Click on OK.
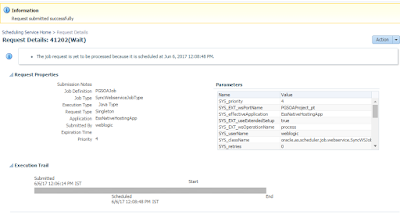
15) Submitted job looks as follows.
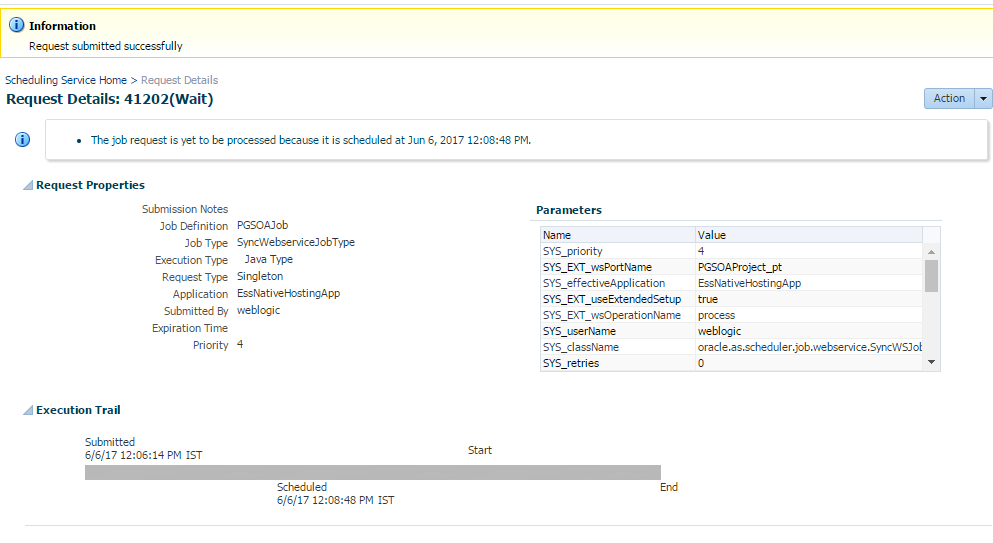
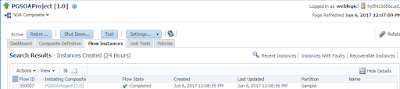
16) Check the instances of PGSOAProject. You will find the process getting triggered once at the above scheduled time.

Submit job request with existing schedule:
Lets check the second option of submitting job with existing schedule. We have already created a schedule in the previous steps (PGSOASchedule). Now we will create a new job request choosing this schedule.
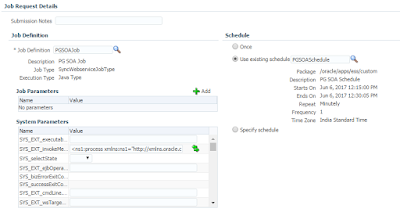
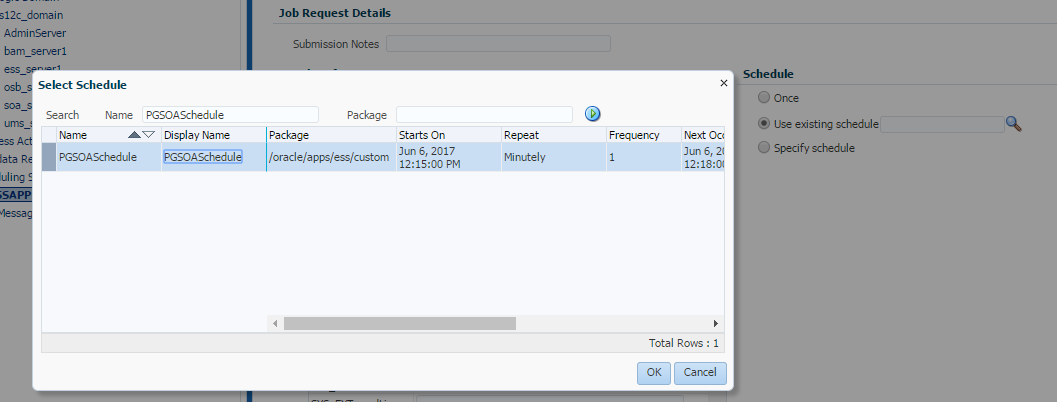
17) Create a job request following all the steps under "Submit job request with one time schedule" option. But in Step 14, instead of Once, choose the option of Use existing Schedule. Click on the search button and search for PGSOASchedule. Once you find it, click ok.
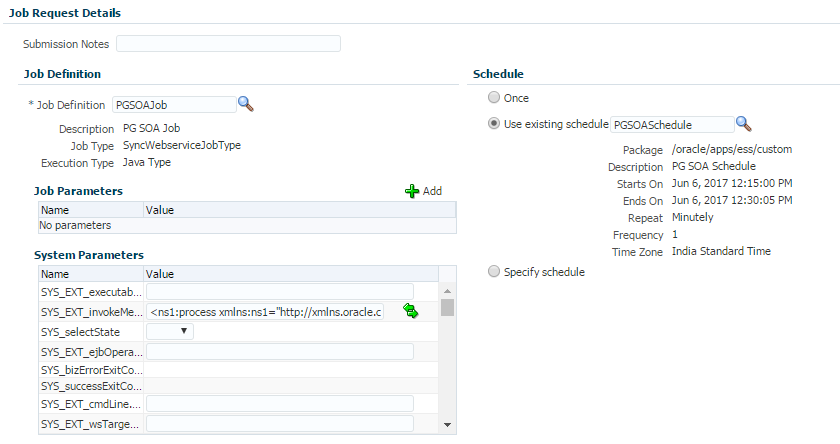
18) The Job request page looks as follows now. Click on OK. The job request has been submitted to run every minute between the mentioned frequency in Schedule.
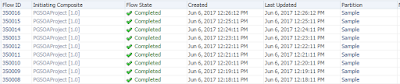
19) Go to the SOA instances and check that the project would get executed every minute in the mentioned time frame as follow.
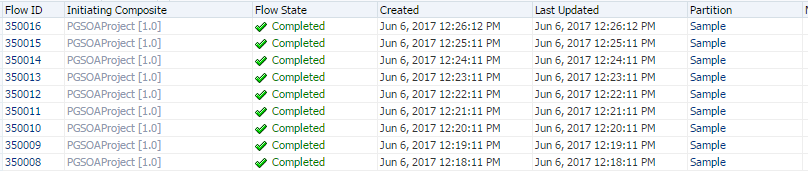
This way, we can schedule services using Oracle Enterprise Scheduler in SOA 12c.